
USA Quilt Tutorial - Riley Blake Destinations Panel
It’s time to update your picnic quilt! If you’re a fan of bright colors and the fifty nifty United States, this project is for you. This project had me singing that memorization song from my childhood all day every day haha. Go grab yourself a State Pride panel and let’s get sewing!
Side note, I just about fell off my couch when I read this week that Ray Charles wrote “Fifty Nifty United States". I did some more digging and found out that it was some other guy named Ray Charles and not the beloved Jazz/R&B/Soul singer-songwriter. Pardon this interruption but who doesn’t love “Georgia On My Mind”?? He’s an American treasure.
Ok! Back to quilting!!
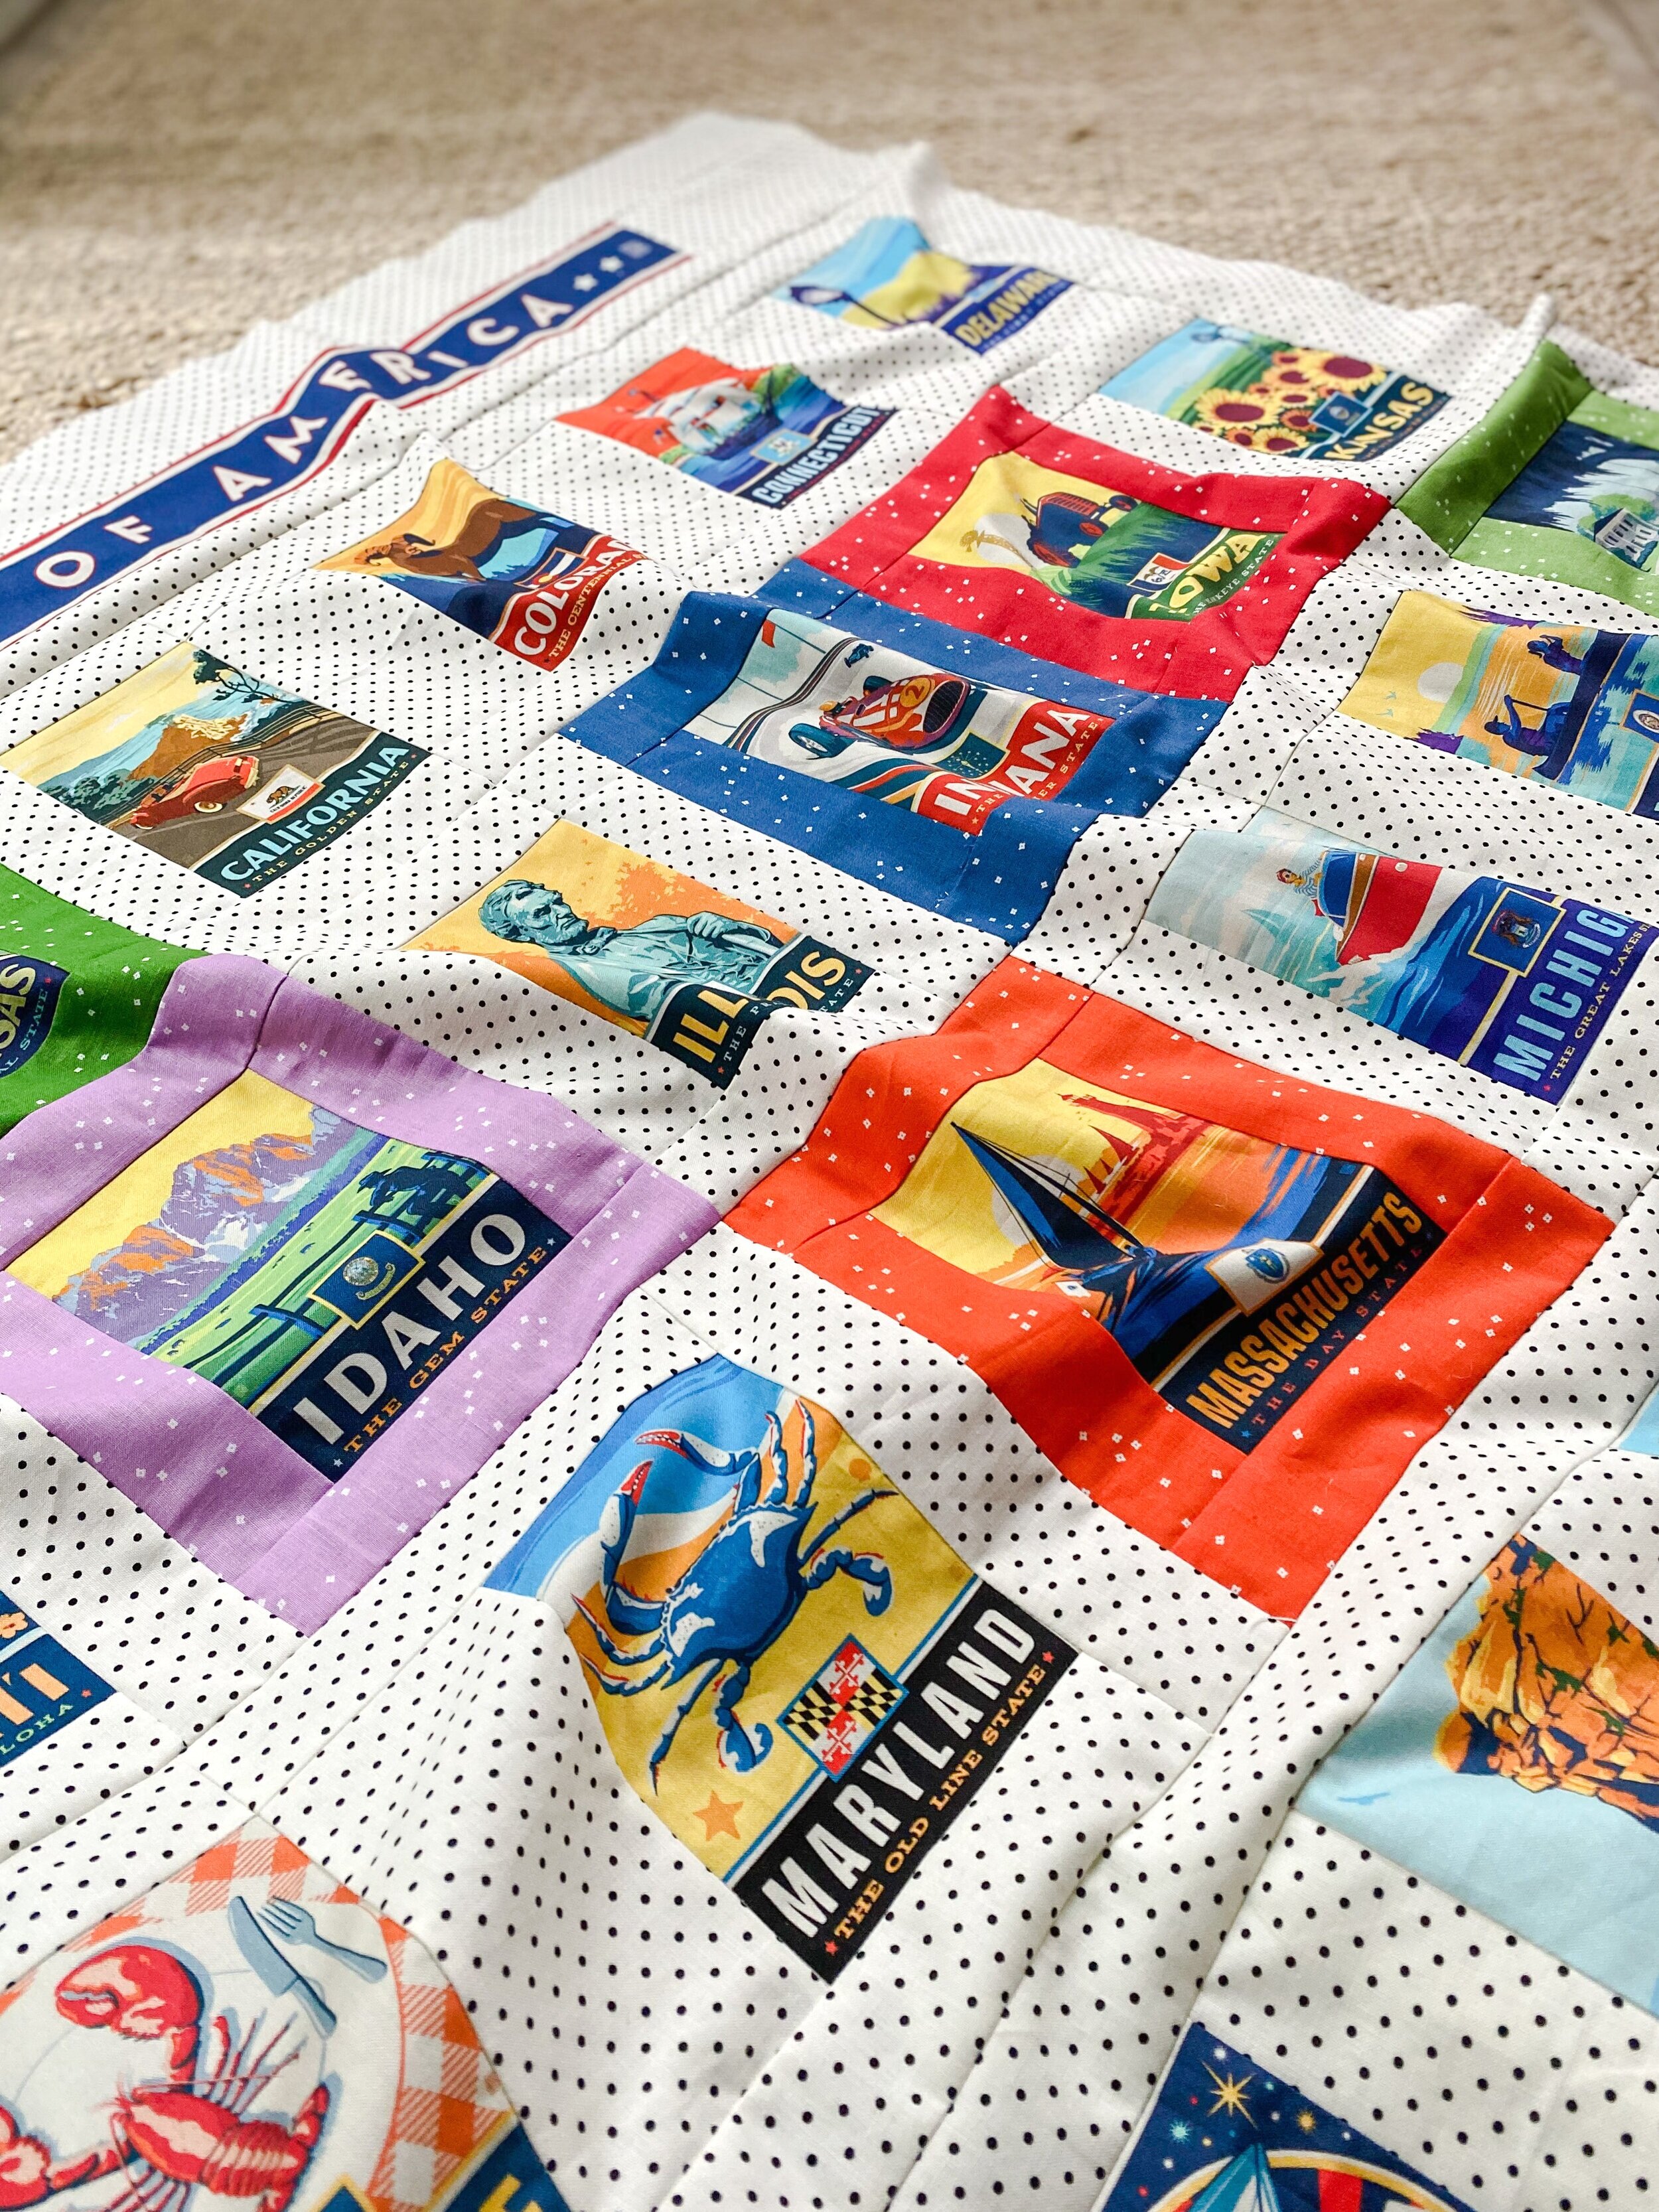
Riley Blake Designs sent me this stunning fabric this summer and it absolutely blew me away! Can you believe how beautiful the colors are?? I love that each state square also includes the state flag and motto. Before sewing, I spent a little time sketching out ideas and even more time working through the math. I was so excited to create something totally unique for my family to use this fall as for some picnics at our favorite parks.

Not only is this panel insanely gorgeous but it is so so soft! I felt kinda guilty cutting it up and was so close to just leaving it as is and making a small quilt (it measures 1 yard by WOF, aka 36” x 42”). This panel is totally ready-to-sew and would make an adorable baby quilt, a cute wall hanging, a cozy pair of pillows, or you could even frame your favorite state! Hopefully these photos do it justice—the colors are so vibrant and each state is lovely and oh so fun.


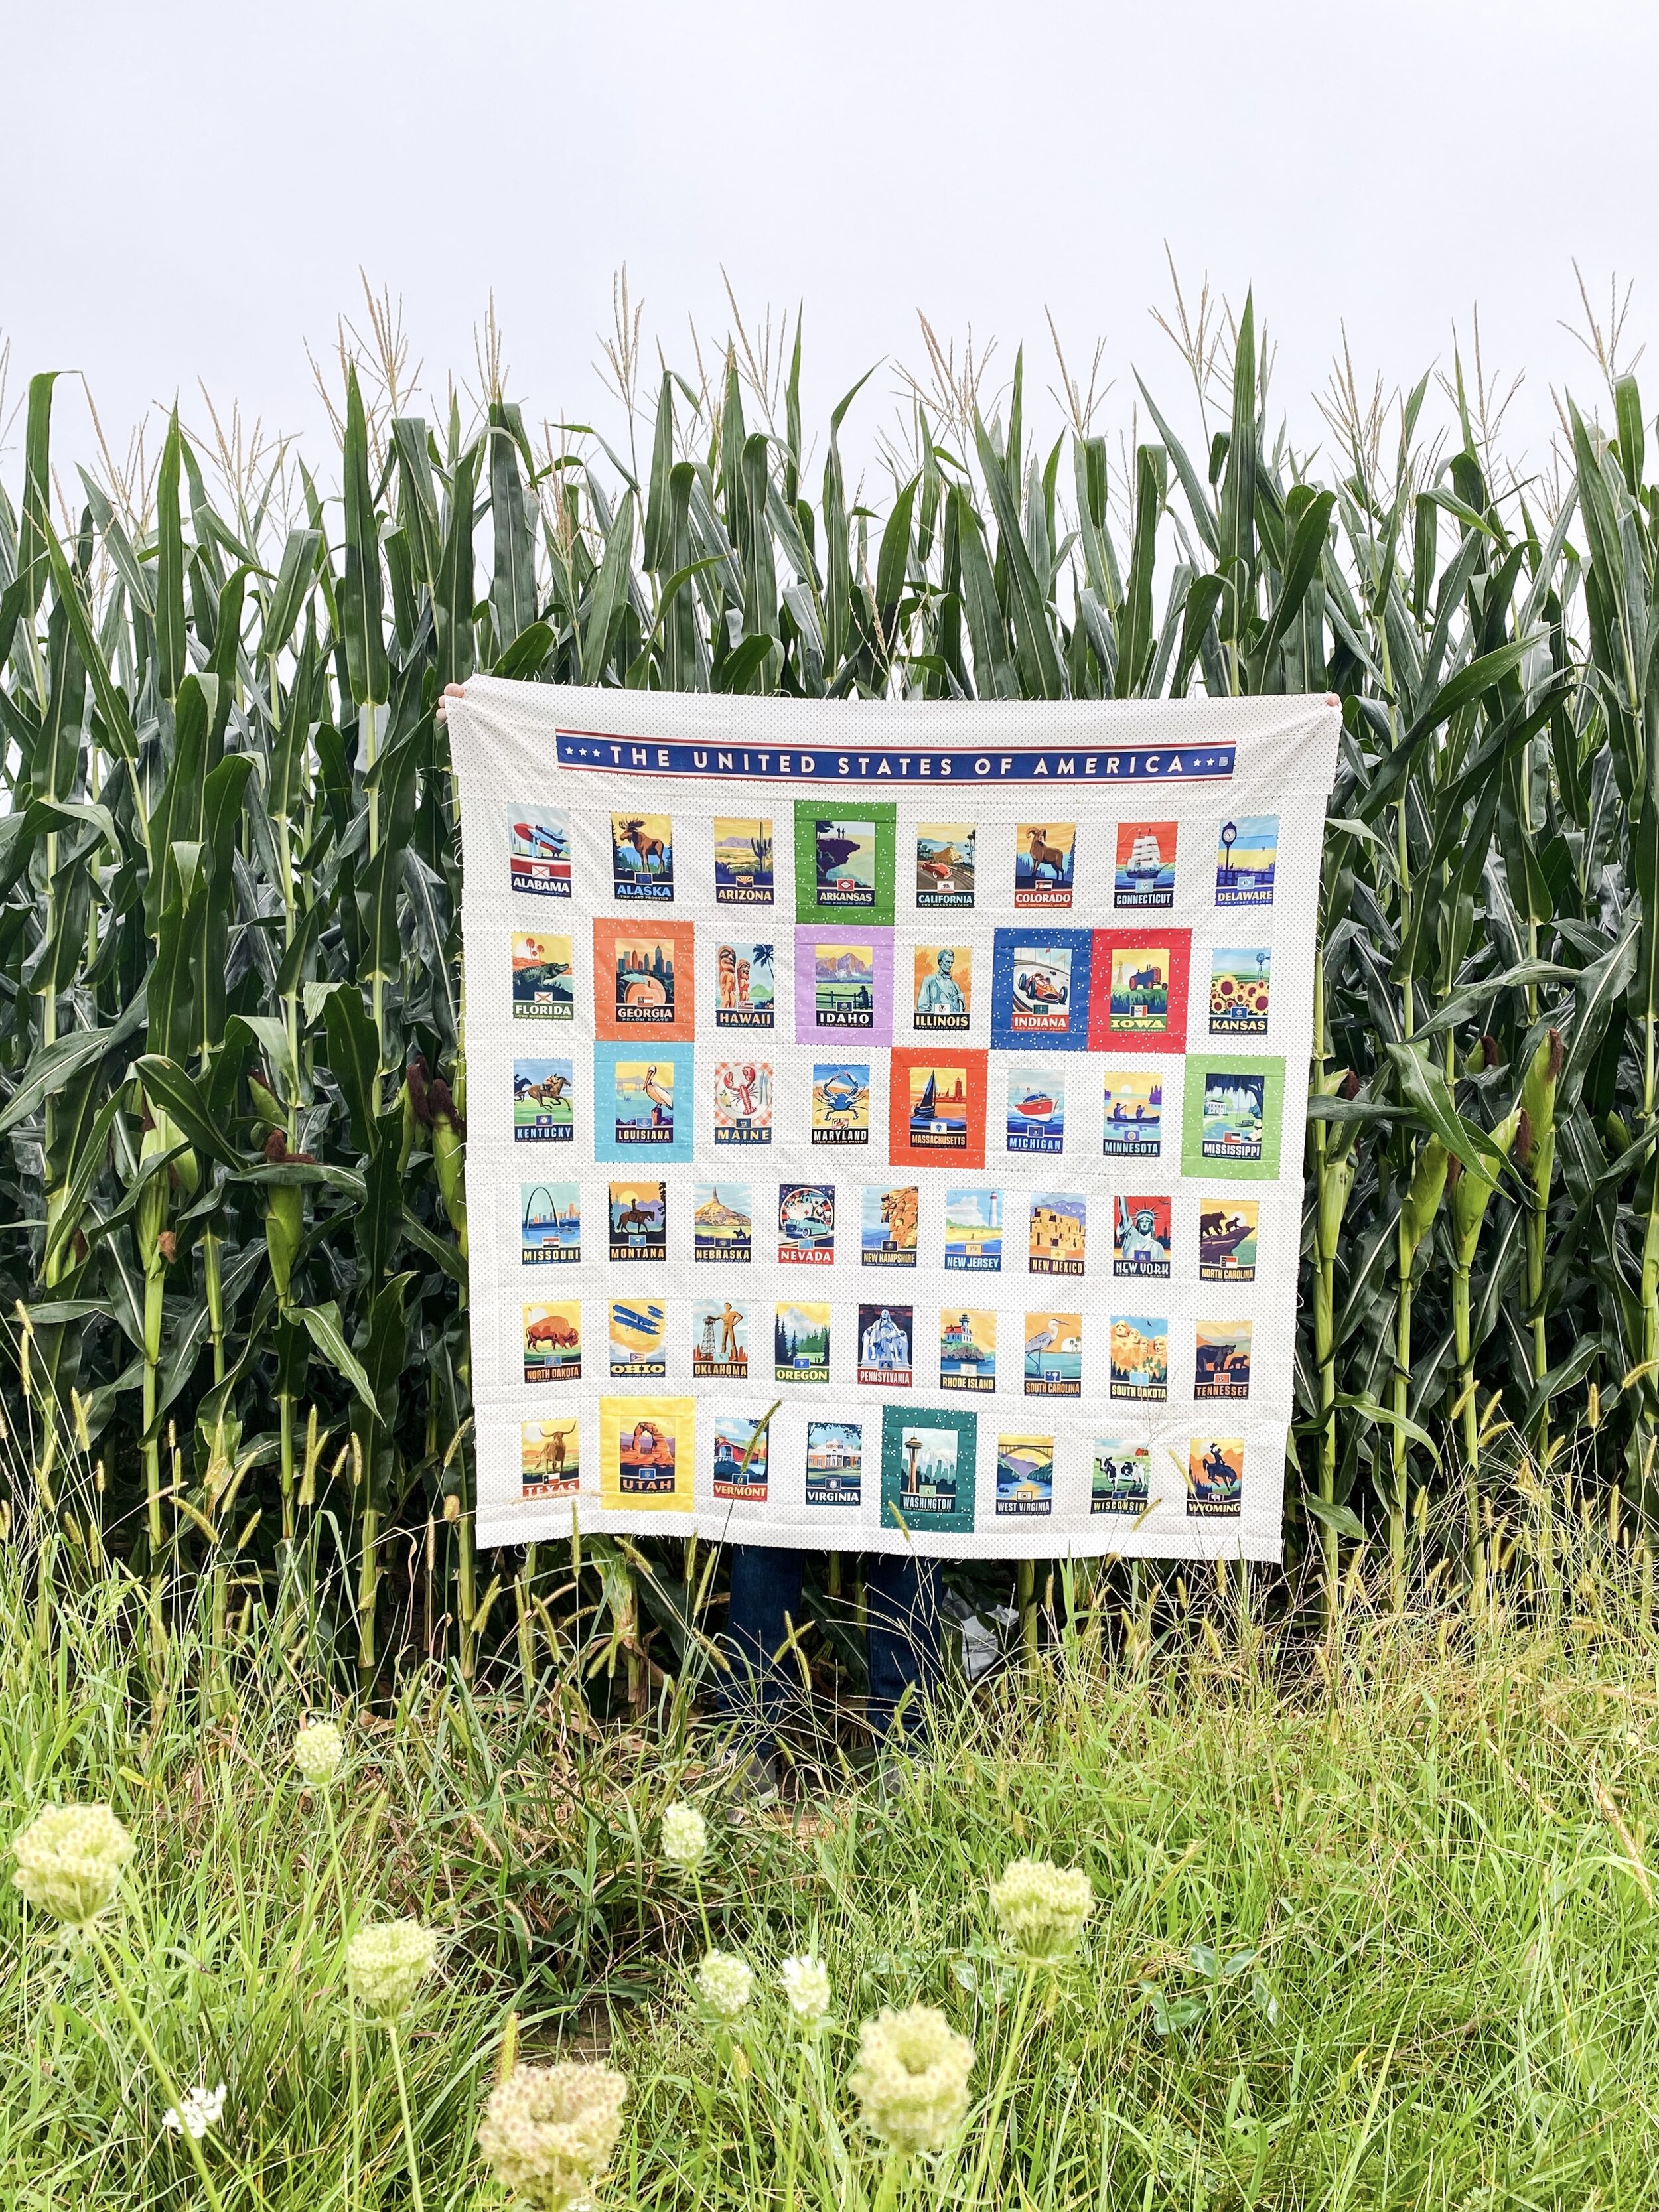
I was able to overcome my fear of cutting up the panel and decided to run a small colored border around each of the states that is uniquely special to my family. We picked states that we’ve lived in and made special memories in. I think it’s safe to say we still have many more states to visit! Since we’ll use this quilt for picnics (thus the red gingham backing) I added the polkadot background as sashing to add size to the quilt overall. I am not a huge fan of rectangular quilts, so I refigured the rows so that the quilt finished more like a square—instead of 5 rows of 10, I made 6 rows of 8 and 9 states.
Fabric details and a tutorial are below, as well as many more photos of the project.
Fabric Details

2 1/3 yards - Le Creme Swiss Dot Navy
3 1/4 yards - 1/8" Small Gingham Check Red
1/2 yard = 1/8” Stripe Denim
3 inches - Blossom Cayenne
3 inches - Blossom Orange
3 inches - Blosson Lemonzest
3 inches - Blossom Pumpkin
3 inches - Blossom Green Smoothie
3 inches - Blossom Jade
3 inches - Blossom Holly
3 inches - Blossom Wisteria
3 inches - Blossom Denim
3 inches - Blossom Peacock

Tools
sewing machine (I have a Bernina 530 and I love it)
thread (I like using Gutterman 100% Polyester)
cutting mat, rotary cutter, and ruler
iron
Before You Begin
Optional step - prewash and press your fabrics. I personally don’t prewash fabrics if they’re all the same type (in this case, quilting cotton) and from the same manufacturer (in this case, Riley Blake).
If you want to add a color border to your favorite states like I did (see above photo), please read the section at the bottom of this page (“Color Border Guide”) BEFORE starting your project. It has helpful tips on math and organization.
Read all steps before sewing/cutting!
I like square quilts more than rectangle quilts, so I decided to modify the row structure. Instead of 5 rows of 10 states, I made 6 rows of 8 and 9 states. The tutorial below will walk you through how to make the quilt layout on the right (see diagrams below) with or without color borders. Finished size is 55” x 53”.


Tutorial
1
Cut panel into individual states and title banner. The gap between the states/banner isn’t quite a 1/2 inch and thus couldn’t yield a perfect 1/4” border around each state. I just did my best (see photos) to cut as close to the middle as I could.
2
Cut background strips. Cut sixteen 3” strips and three 2.25” strips (unless you are going to be adding color borders to some states*).
The 3” strips will be used for the 8-state rows, the horizontal sashing in-between rows, and the outside border. The 2.25” strips will be used for the 9-state rows.
*If you want to do a color border around your favorite states, you’ll need three widths of sashing: 3”, 2.25”, and 1.75”. The quantity of strips you’ll need will depend on the number of bordered states you’ll have. I recommend just cutting each size of strip as you need it. It’s not the most efficient, but it’ll save you the headache it caused me having to re-trim many, many strips.
3
Sew background strips to the left side of each state square—except the first square in each row. Place the state square on top, right sides together (RST), and use the border of the square as a guide for stitch placement (see photo below). I shortened my stitch length to about 2.5 to provide extra strength, and moved the needle position to match the border of the state square.
You can cut the strips to size before sewing if you prefer, but I opted to sew and then cut.
Remember that the 8 state rows will use the 3” sashing and the 9 state rows will use the 2.25” sashing. You are free to adjust the number of states in each row as you like. For example, you can make the first and last rows have 9 states, and the four middle rows have 8 states (the first rows would have Alabama to Florida and the last would have Tennessee to Wyoming). Feel free to get creative and shuffle the states around as you like.

4
Assemble the rows. Trim the sashing to the size of the state squares (if you haven’t already) and sew the states + strips together to assemble the rows (in alphabetical order!). Rows should start and end with a state square. Press the seams open or to the side.
5
Sew rows together, adding a 3” background strip in-between each row. Take the extra time to pin your rows to ensure that the states line up when the rows are sewn. Press new seams open or to the side.

6
Sew 3” background strips on left, right, and bottom sides of your quilt top. Press new seams open or to the side.

7
Prepare and sew USA banner strip. Start by sewing a small length of 3” sashing on the left and right sides of the banner strip (I didn’t measure, just eyeballed it) and then sew a 3” strip on above the banner. Use the same technique as before—sew with the USA banner on top so you can guide the stitch placement. Press new seams open or to the side.
Sew the banner and sashing to the top row of your quilt top. Ta da! You’re done!
8
Baste, quilt, bind, & enjoy your new quilt!
Color Border Guide
Adding a color border around some states is the perfect way to add a personal touch to your quilt. This guide isn’t entirely prescriptive, but it’ll give you an understanding of how to recreate the borders.

I recommend you sketch out the state panel and plan your borders before you start cutting. I just downloaded the panel photo from Riley Blake’s website and messed around with the organization until I settled on the number of states that I wanted in my rows—8, 8, 8, 9, 9, and 8. Feel free to move the 9-state rows around if you like! They don’t have to stay in rows four and five (where I decided to put them).
To border a state in an 8-state row
Cut border fabric to 1.75” & background sashing to 1.75”
Sew border around the state
To border a state in a 9-state row
Cut border fabric to 1.25” & background sashing to 1.5”
Sew border around the state
Next steps
Return to step 3 of the tutorial, taking care to use the thinner strips (1.75” instead of 3” and 1.5” instead of 2.25”) between the states adjacent to the bordered state (see diagram below).
You’ll find that you now have a mismatch in height between the “regular” states and your bordered states. For both the 8 and 9 state rows, add 1.75” sashing to the top and bottom of the “regular” states so that each one matches up in size when sewn together in a row (see diagram below).
Note that you’ll now have to adjust the sashing of the other rows that meet this row. The row directly below now only needs a 1.75” sashing instead of a 3” strip.

And that’s it! Good luck and have fun making cute borders around your favorite states!


I can’t wait to see what you create! Share your quilt using the hashtag #destinationspanelquilt.
Happy sewing!