
Double Cuddle Blanket Tutorial

What’s better than one cuddle blanket? Double the cuddle! I don’t care how hot it is outside—I always love having a blanket to snuggle with. I mean, I prefer quilts for obvious reasons (wink wink), but sometimes too many extra layers in the hot and humid summer is not often welcome. Thus the idea for this quilted cuddle blanket was born.
You know I love quilts and I refuse to talk bad about them haha, but sometimes quilts (with their lovely layers of cotton and fluffy batting) can be a little too warm for those extra hot days. While folding laundry one day (so glam, I know), it hit me that I could make a breathable summer blanket just like baby swaddles!
We headed Joann’s (one of three places I can find fabric in my town—the other two being Walmart and Hobby Lobby) to search for some light and breathable fabric. I love taking my little helper along, it cracks me up to see what draws his attention. He loves ultra fuzzy fabrics and literally screams when he sees anything with cars on it.
I decided to use cuddle fabric because of its incredible breathability and—of course—the major cuddle factor. Some fabric stores call it cotton gauze, or nursery fabric, or swaddle fabric, or sometimes muslin. Here is the link to the fabric that I found at Joann's. They had a decent selection of printed cuddle fabrics, but I really really loved the earthy tones of the solids. It was hard to pick just one combination—all the colors are so pretty!
I chose the colors Lunar Rock and Blue Fog. Final blanket measurements are roughly 43 x 43 inches, but if you prefer a larger size (lap/throw dimensions are typically 40 x 60 inches), I’d recommend you buy 1 ¾ yard each for both the top and the back.
Fabric & Tool Requirements
top: 1 ¼ yard cuddle/swaddle fabric
back: 1 ¼ yard cuddle/swaddle fabric
matching thread (I like to use Gutterman SewAll)
large bowl (the larger the bowl, the wider the curved corner will be)
hera marker/fabric marker
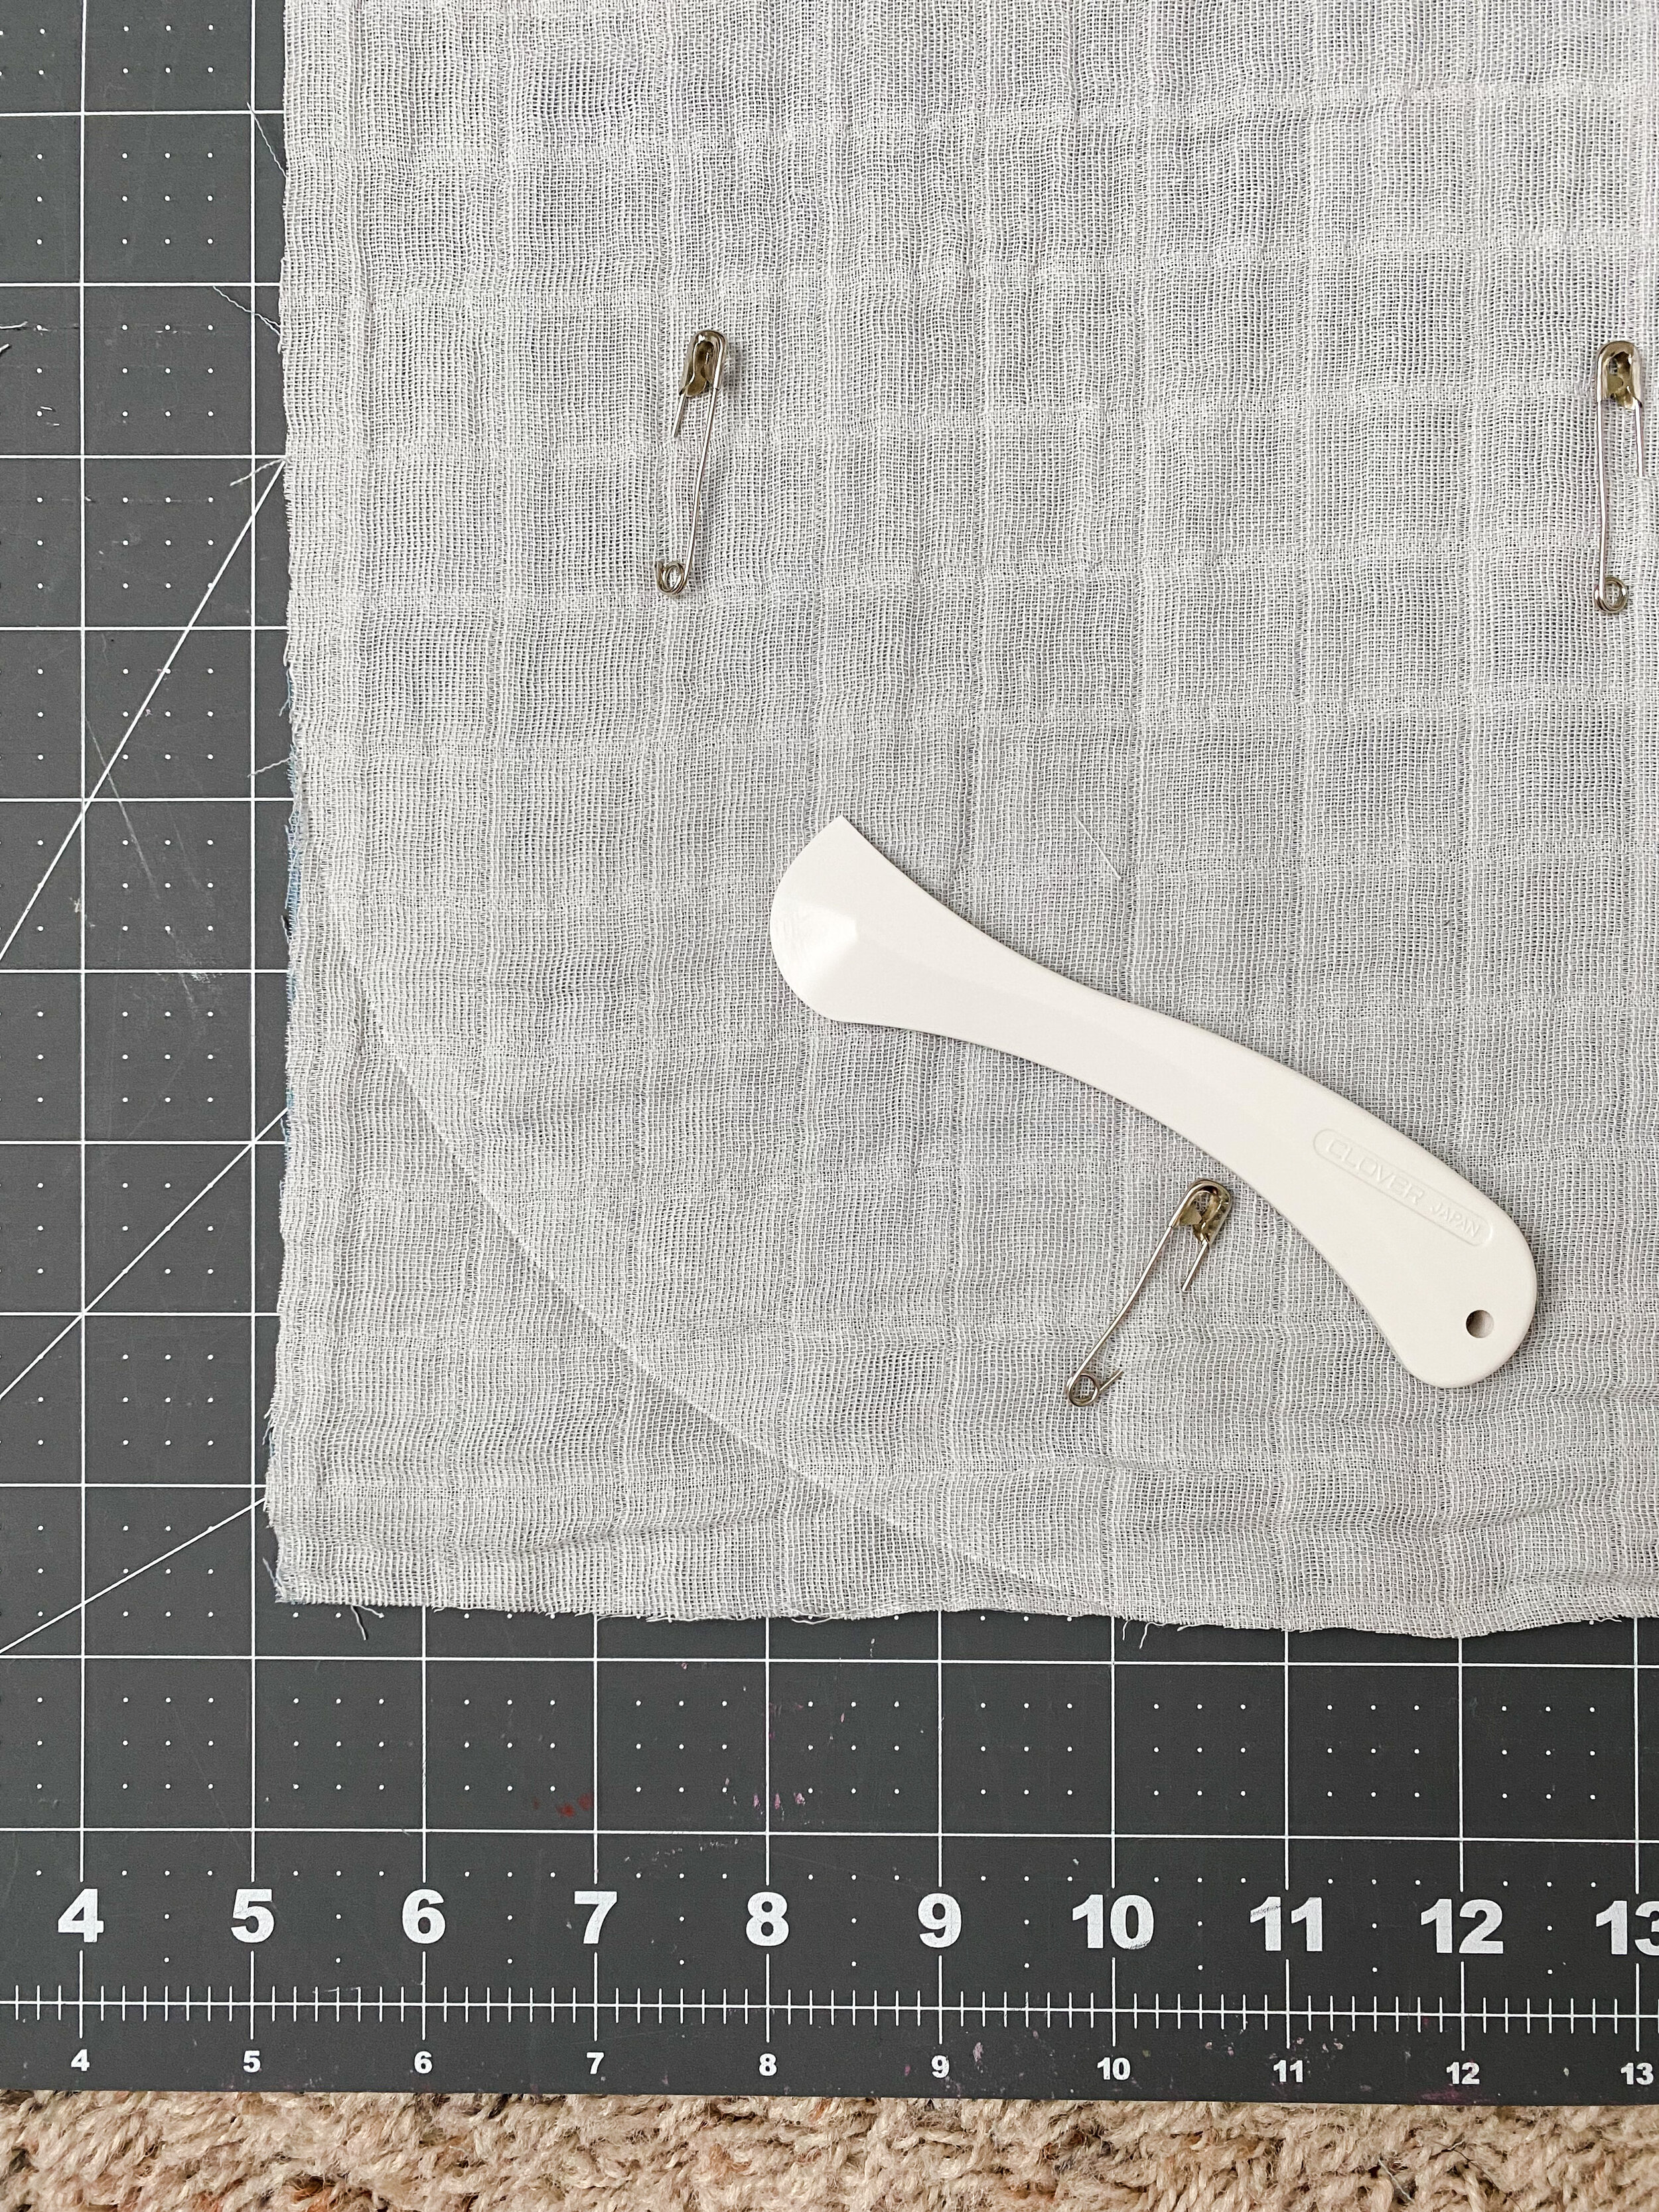
pins
rotary cutter & cutting mat
iron
sewing machine
walking foot
Before You Begin
Prewash your fabrics the same way you’d wash your blanket once sewn together. A safe bet is to wash cold on delicate and to tumble dry with low heat. I’ll be honest with you—I only prewash my fabrics when the fabrics are different types (cotton, cuddle, minky, flannel, etc.) or from different manufacturers. In this case both of the cuddle fabrics were from the same line at Joann’s so I chose not to prewash.
Tutorial
1
Iron fabric. This is normally a step I include in the “before you begin” section, but I chose to put it here after I tried (and failed) to line up my fabrics pre-heat press. Cuddle fabric is a bit wriggly and can be difficult to work with, so save yourself the headache and iron both fabric pieces completely smooth.
2
Trim selvedge & square up your fabric. Unless you have a table large enough, I definitely recommend using your floor for this step. “Square up” is simply a quilting term for trimming your fabric/quilt into final square or rectangle shape. Lay the two pieces of fabric on top of each other—right sides together if using prints. Gently smooth out any wrinkles, being wary of stretching the fabric.
I used the selvedge and the squares in the fabric as a guide for my straight edges. Feel free to mark your lines first with a fabric marker or light pencil. Using a long quilting ruler (I’ve also used a long, straight piece of cardboard many times before), trim your fabrics to make a square that is roughly 44 x 44 inches.
3
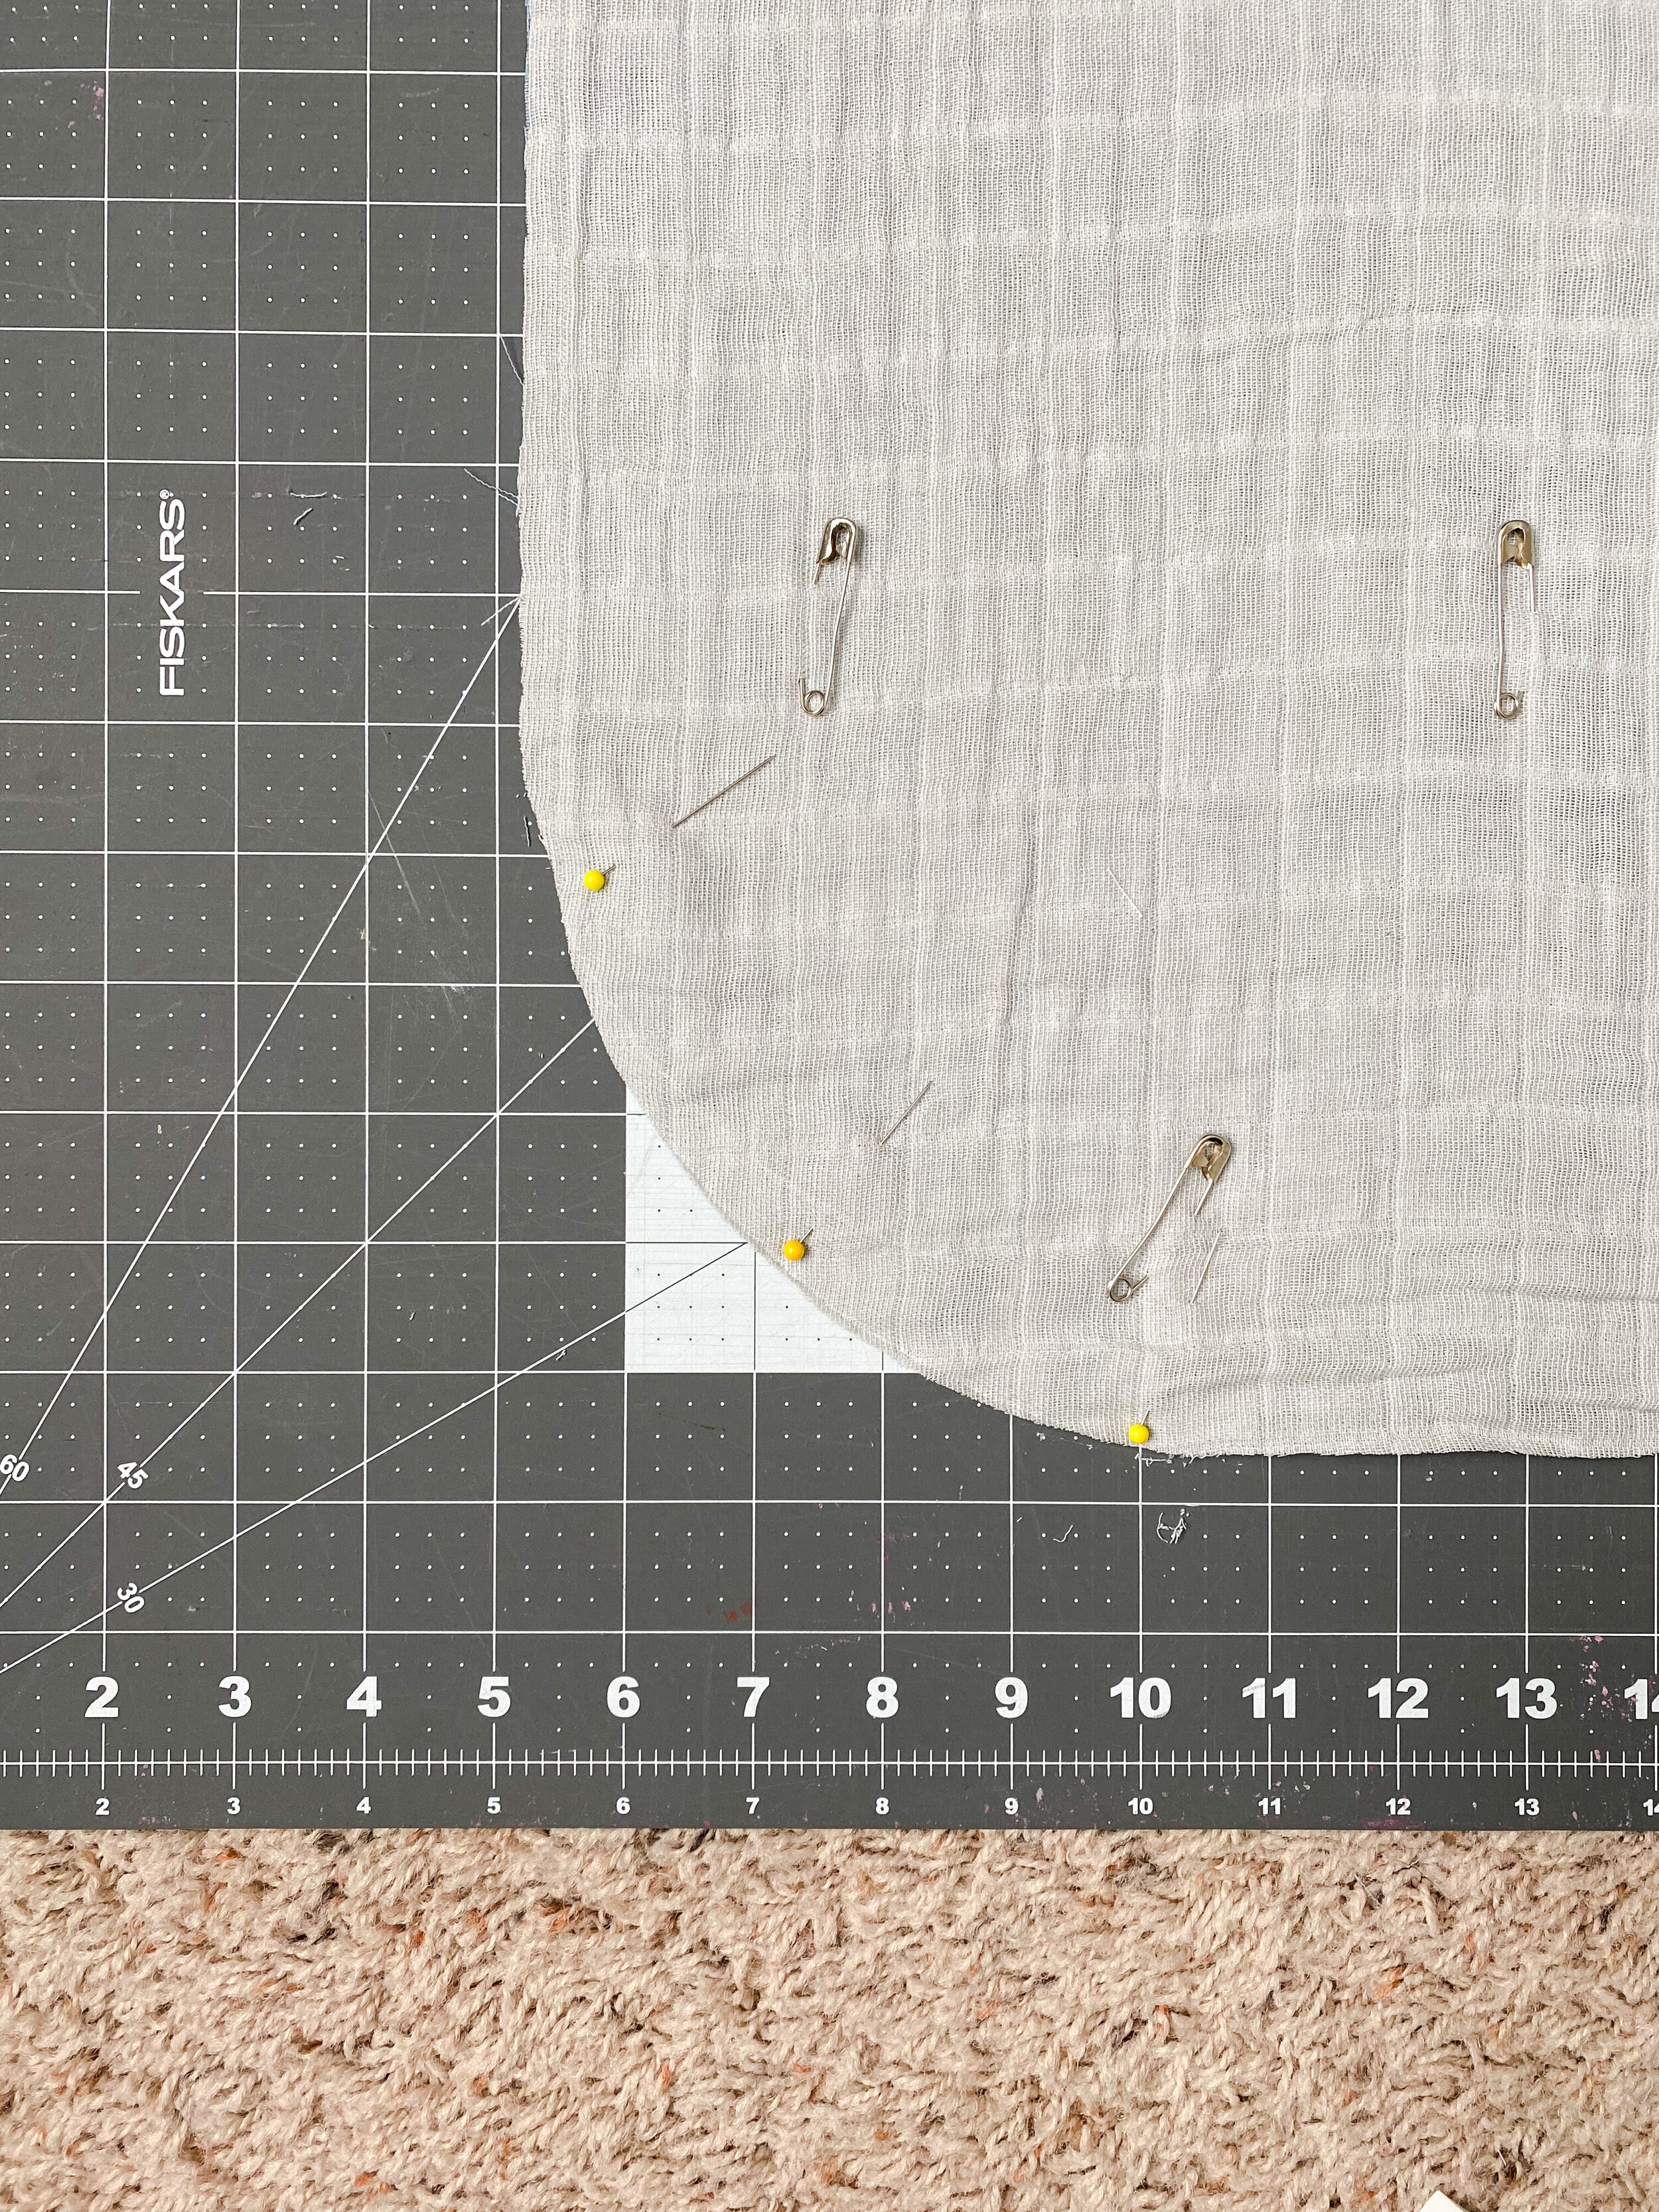
Mark your curved corners. Use a large bowl and a hera marker (the back of a butter knife used with care or a fabric pen also work just fine!) to mark each curved corner. FYI, Suzy Quilts has a great blog post all about hera markers if you’re inclined to learn more. I used the biggest mixing bowl I had because it gave me the widest curve—which will be the easiest to sew!
4
Trim curved corners & pin. Carefully trim rounded corners and pin in place. I used straight pins for the edges and curved pins to gently keep the two fabrics together.
5
Sew a ½” seam around all edges, leaving a 6 inch gap. Using your walking foot*, sew a ½” seam (place your stitches a ½” from the edge of the fabric) around your fabric. Stop sewing about 6 or more inches from your first stitches to leave a gap that will allow you to turn the blanket right side out.
*If you do not have a walking foot—don’t fret!—use your regular foot and sew nice and steady. The walking foot just gives some extra help here so that the fabric doesn’t pull unevenly while sewing.

6
Turn the blanket inside-out. Reach your hand inside the 6 inch gap and turn the blanket inside-out so that the seam is on the inside. Push the seams all the way out and press with an iron to flatten.
7
Close the 6 inch gap. Fold the un-sewn fabric inside, matching the size of the seams already sewn. Sew seam close to the edge, backstitching at beginning and end.

8
Sew around the blanket with a ¼” seam. I like to lengthen my stitch for top-stitching/quilting to a 4.
9
Sew another stitch around the inside of the blanket. Widen your seam allowance to ½”, and sew on the inside of your last stitch. You can add any additional quilting if you’d like, otherwise you’re done! Hooray!

Share your cuddle blankets on social media with the hasthag #quiltedcuddleblanket. Enjoy your new favorite summer blanket!